Wednesday 28 October 2015

Blogger's Quilt Festival 2015 - Part 2


As part of the Blogger's Quilt Festival 2015 all makers are allowed to submit two quilts. This is my second entry which i made as part of the Instagram Hand Pieced Mini Swap and probably my favourite make to date.


All the fabrics were fussy cut and i picked out some of my favourite prints and colours for this project. I love to fussy cut when using English Paper Piecing.


I started and stopped this project so many times as i had no clear plan of what to create. I cut up a few hexagons and started to make one triangle as a starting point. Once i had finished this i realised i could continue making these triangles and join them into one large hexagon. The whole hand pieced top was then machine appliqued onto a white background and after much deliberation i decided it looked better as a hexagon than it did on a square background and went for it.

I'm now trying to pluck up the courage to make another, just for me.........


Blogger's Quilt Festival 2015


If you don't know about The Blogger's Quilt Festival then please go check out the blog of Amy Ellis to find out a bit more about it. Amy has set up this great forum for people to share their wonderful quilts and it also gives us the opportunity to enter our quilts in categories like a virtual quilt show and to see lots of wonderful creations from other international makers. I must admit i only heard about it very recently so feel a bit weird entering a couple of my own but nothing wrong with joining in the fun is there.

So, my first entry is in the Art Quilts Category. This particular quilt is one of my favourites probably because it was challenging, fun and rewarding.


I was commissioned by a friend's mum to make a small art quilt for her friend's retirement gift. I was pretty much given free reign to do what i liked but i did message ideas etc to get a better idea of the direction to head in. I started by cutting and piecing random low volume prints and greens to make up the background, i knew i wanted a fairly ombre look to the greens to show off the flowers i would put in front of it and i loved the effect it gave. I aimed for it to look like grasses blowing in the wind and think i pulled it off!


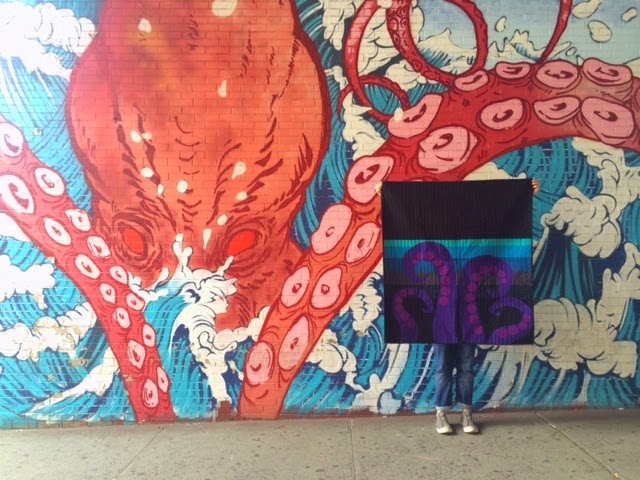
I continued by adding and layering the various reds for the flower petals and attached them to the background using raw edge applique by machine. I wanted to flowers to look fairly realistic but also to have a kind of illustrative quality to them. Once all the flowers were in place i basted up the layers and started quilting. The detail above shows how i tried to add to the idea of the long grass blowing by using some free motion sweeping lines. I also went over the flowers so that they were echoed on the back of the quilt. Finally I hand embroidered a quote by Charles Rennie Mackintosh on the back, the quote had been given as part of the inspiration for the quilt.


I hope you like it - remember to check out all the amazing quilts on Amy's Creative Side and vote for your favourites!

Tuesday 28 July 2015

Paving Stone Block - Bee Europa


This month is is my turn to take over the Hive in my quilting Bee - "Bee Europa" and i'm pretty excited about it! It's a nice simple block made from HST's but one which i know i wouldn't have the patience to make several of so it seemed like the perfect choice to send out to all my lovely Bee Mates. I will post the tutorial below for you all (and for anyone else who may read this and like to try it out), and as always if you have any questions just get in touch.


I have sent everyone 8 coloured squares and 8 low volume white/cream coloured squares each measuring 5 inches. (The packages sent to each of you vary in colour, i apologise in advance if you end up with a colour you dislike).
Firstly, pair up each coloured block with a low volume one and place right sides together. Draw a diagonal line on the back of the low volume block and sew down each side of the line using 1/4 seam allowance.


Trim along the line in the centre and press open (I tend to press seams open when doing HST's but press open or to the side, whichever you prefer). At this point you can trim the blocks down to 4" squares (there should be plenty of fabric left over here for trimming down).


Arrange your blocks like the image below, the corner blocks being coloured and the centre square coloured (don't worry about directional prints facing the correct way, just place in the order you like the best).


Sew together in rows using the same 1/4" seam allowance and then join these up! The block should measure 14.5" when done (mine was 14.25", see i told you i'm not the most accurate sewer so please don't worry if it's slighty off haha). That's it, easy peasy. I think it's going to look fantastic when they are all together - i can't wait to see :)


Wednesday 13 August 2014

Sewvivor Sew-A-Long


Let me tell you a bit about my entry for the Sewvivor Sew-A-Long first challenge which is Nautical.

This one has been so much fun to do especially since i had absolutely no idea at all what i wanted it to be and zero grand plan, it was improv all the way which suits me fine, it's how i normally work and how i love to work. My first thoughts were to just try out various improv type pieces of patchwork under a Nautical/Maritime theme square them all up and make a quilt from them..... not how it ended up at all.


This first picture was just me starting to piece some scraps together in the hope I could make them look even slightly like the underside of a whale. I stitched together some randomly placed squares and half square triangles for the top half of the whale body and trimmed to a whale-like shape. I wanted the background to be simple square patchwork in low volume prints to make the whale really stand out when appliqued on top.


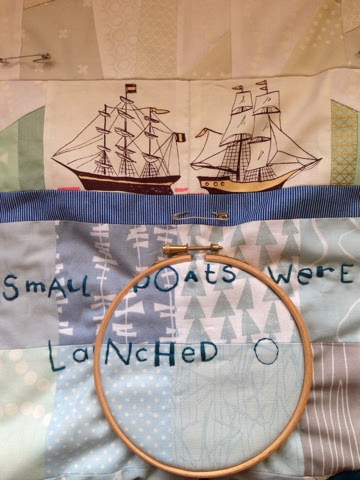
At this point i thought it would be nice to link the finished piece to Dundee and remembered the story of the Tay whale and the poem written about it. I soon realised i wanted to include some hand sewn words, so i chose these lines, "Small Boats were launched on the Silvery Tay, While the monster of the Deep did sport and play." They are from the poem The Famous Tay Whale by William Topaz McGonagall who was widely hailed as the writer of the worst poetry in the English Language!!! (Don't believe me, look it up). The whale swam into the Firth of Tay in 1883, it was harpooned, escaped and found dead a week later. The whale's skeleton is displayed in the McManus Galleries in Dundee.


I regretted the decision to hand embroider these lines pretty quickly.......it took SO long to do!


The surface area (or top section of the quilt) has some wonky improv patchwork for the sky, some strips pieced for the hills/land in the background and a couple of boats setting sail to hunt down the whale.


The quilting differs all over the piece. Some wavy lines on the darker blue sections, matchstick quilting on the underside of the whale, some free motion quilting for the sea area around the whale (I'm still a complete novice at this), and some zig zags to echo the shape of the hills up through the sky. A blue binding finished it off, darker at the bottom and a turquoise round the top. 


I'm pretty pleased with it and the reaction to it on Instagram has been so amazing, I'm totally overwhelmed by all the lovely comments people have left me about it. 

Sewvivor

Have you heard about Sewvivor?

It is a kind of online reality show type competition where the final 16 contestants are given quilting challenges every couple of weeks. The finalists finished products are posted on the Family Ever After Blog and put up for the public vote. 10 out of the 16 get through to the next round and narrowed down with each challenge until we have the Sewvivor.

There are some amazing entries for the first challenge "Nautical", sew anything quilted with a Nautical theme you can see the entries here. Pretty great huh!

Here are a few of my favourites.


Friday 8 August 2014

Sea Breeze Mini - finished!!!


Here it is folks, the finished Sea Breeze Mini Quilt! I love the bright colours and it has been so much fun to watch everyone's pieces come together on Instagram over the weeks. A huge thanks to Angie of Gnome Angel fame for hosting and to Megan of Canoe Ridge Creations for the easy to follow pattern.


So what have i learned during this whole quilt-a-long.....
1 - My accuracy skills suck, they still need some serious work. I need to get some more practise with HST's and learn to follow a pattern!!! It's written that way for a reason Sandra. My finished mini is 22"x 23" instead of the 22.5" on the pattern (It's actually a lot closer than i though it'd be haha!).
2 - Learn that less is more, matchstick quilting is good sometimes but not always and it will make those nice straight lines pretty wobbly as you pull the fabric.
3 - The Instagram community are fab. Everyone has been so nice and encouraging to each other and made this whole thing so much fun.

Thursday 31 July 2014

Sea Breeze Mini

I recently signed up to another Quilt-a-long through Instagram. This one is hosted by Angie of Gnome Angel and she selected the Sea Breeze Mini Quilt by Canoe Ridge Creations, you can buy the pattern here if you want to give it a shot yourself. Go on go on go on!


What better opportunity to get some of those Cotton and Steel basics out and chop into them eeek. And it's a double eeek because this pattern involves a lot of HSTs and requires a fair amount of accuracy when piecing, something I am no good at at all!!!! Actually it's only my second time using a pattern as I'm normally a bit of a make it up as you go along kinda gal. Anyway, it's only a mini so I thought it couldn't really be too painful haha! 


As it turns out the pattern is well written and very easy to follow. Of course I had to do it my own way and pieced it differently to the way the pattern stated (obviously leading to some points being pretty off, if you stand far back enough you can't see, hmmm).


It's still a work in progress and I've to finish off the binding so I'll take a photo of that soon for you to see. The quilting was mainly matchstick leaving a few strips empty for added texture and interest. I need to get over my matchstick quilting obsession, the old saying less is more would have been the way to go here and keeping it simple would've really made the pattern pop but hey, I'm not one to know when to stop. 


I hope to get that binding done tonight and show you the finished quilt soon - watch this space......

Friday 11 July 2014

This Weeks Project


I received my new bundle of fabrics from the Blueberry Park Fabric Club recently so thought I'd put them to work straight away. I wasn't sure where I was going or what I was going to make but in true 'me' style just went for it and made it up as I went along. 


I knew I wanted to try to make a wonky star so set about figuring out how to do that....the rest just kind of grew around it. I love how Karen's fabric colours are not always ones I would put together but work so well and make me explore different colour ways. 


Again, I didn't really know which direction I wanted to take with the quilting so just let it happen organically. I quilted into the points of the large and smaller star by machine to let the star stand out from the background then filled the rest in! 


At this point I decided to give hand quilting a bit of a shot, perhaps not my best idea but fun nonetheless. The front looks ok but the back is shall we say, slightly more interesting!!! Nothing a bit of practice won't sort haha.


So here is the finished mini. I like its wonkyness, love the colours and I forgot to add that it is a surprise gift for someone. I spent this morning adding a small label to the back before taking it to the Post office. I'm a bit nervous if it's new owner will like it or not, I hope so, I think it should be to their taste..... Keep your fingers crossed xxx


Saturday 5 July 2014

Respect


I have so much respect for the quilters out there who can spend hours cutting, stitching, trimming and piecing! I love the look of a whole load of HSTs sewn together with the points matching up, perfectly aligned but after trying it out I know I would never have enough patience to complete a  quilt like this (unless the squares were huge or I spent about a year on the thing haha!). I had such a great idea in my mind of how this would look as a throw on the double bed on our spare room, randomly placed HSTs giving a nice random, wonky type feel to the quilt but it's not to be, not for no patience me!!!! It may just become another mini, lucky I like them so much now..... It can always just be a little mat for the bedside cabinet.... And I'll be happy with that :)

Friday 4 July 2014

Schnitzel and Boo Mini Quilt Swap


A couple of months ago whilst flicking through my Instagram feed I saw someone repost that they had just signed up for the Schnitzel and Boo Mini Quilt Swap! After a lite bit of investigating Iooked it up and thought I'd go for it, boom, I signed up! Eeek! 


The Fantastic Kristi of Schnitzel and Boo has already run one of these swaps and around 200 people signed up....this time over 600 did, pretty amazing huh! 


You fill in a form with your details, social media, favourite fabric designers, patterns etc and through this they allocate you a secret partner. You can stalk their Instagram, Flickr, Pintrest etc and get a feel for what they would like you to make them. You keep your partner a secret and can post updates, sneak peeks under the hashtags #schnitzelandboominiquiltswap #makeaquiltmakeafriend. The person you are making your mini quilt for will be making theirs for someone else and so on and so on....
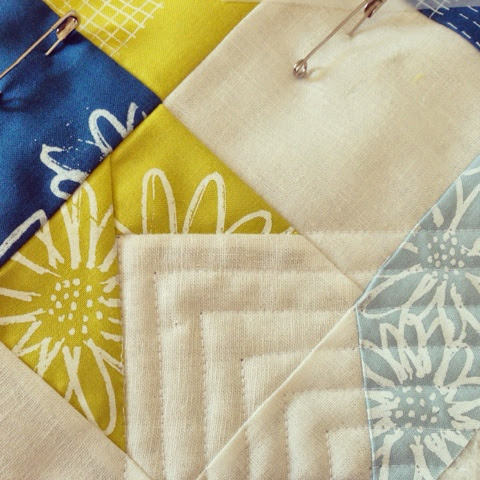


I cannot tell you how much fun it has been to take part in this swap. Watching the minis come together in the hashtags and seeing all the wonderful minis arriving at their new homes. I can post this now as my partner Erica received the mini I made for her yesterday, it travelled all the way from Dundee to California...... And she loved it phew!!!! 


I'm currently stalking the postman to see if mine is going to arrive soon!!!